Pick a landing area, search nearby buildings, and keep a way out. Explore six search areas, or follow the detailed Fortune’s Fort and ship-vault walkthroughs with chest checkpoints, entrance screenshots, and opening steps.
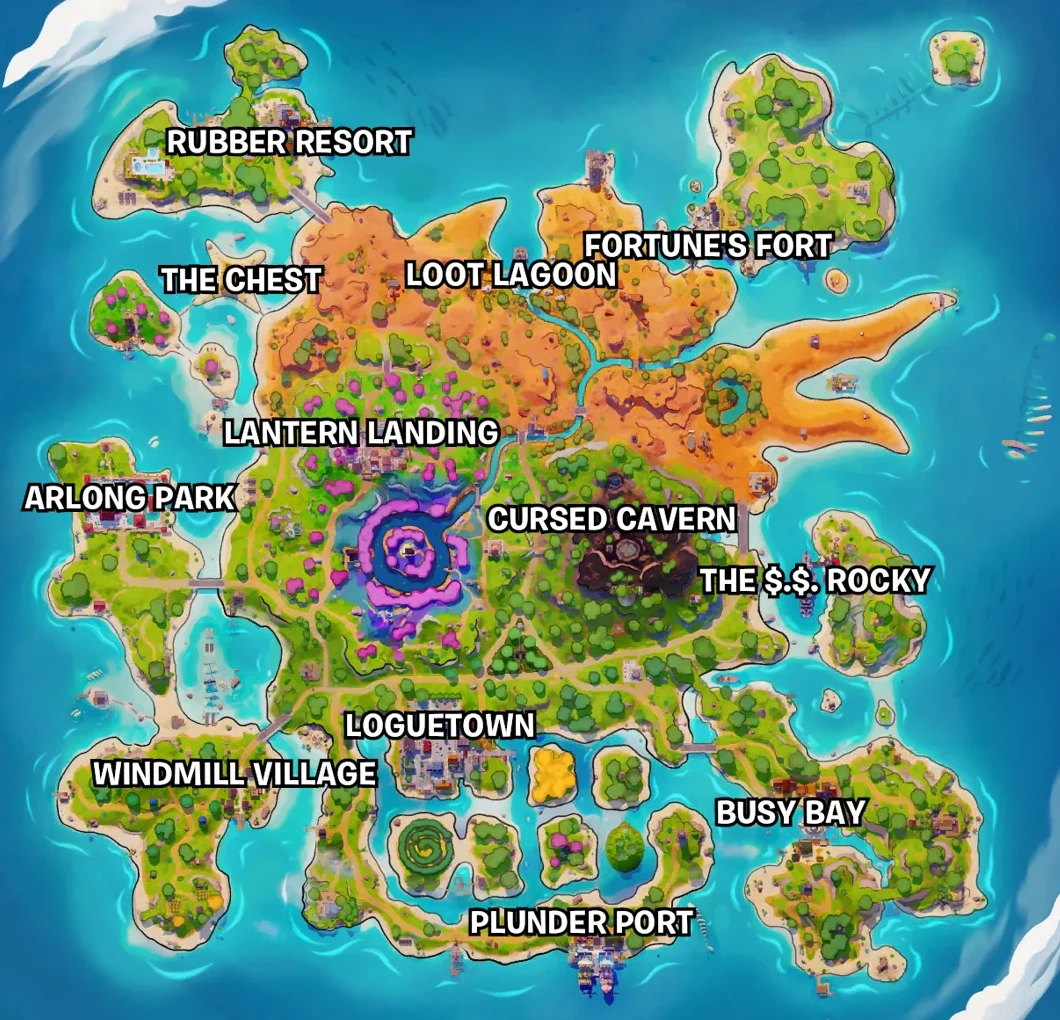
Numbers identify search areas; A and B link to detailed routes for those areas. Markers do not identify individual chest spawns. Chest availability varies between matches. Zoom in, then scroll to move around the map.
Hunting the shop token? Search standard chests while the event is available. The map helps you plan where to look; no marker guarantees Pirate Shop Access. See how the token works.
Six places to start searching
Use the map details to choose an area. The steps below are suggested search routines, not a chest-by-chest spawn list.
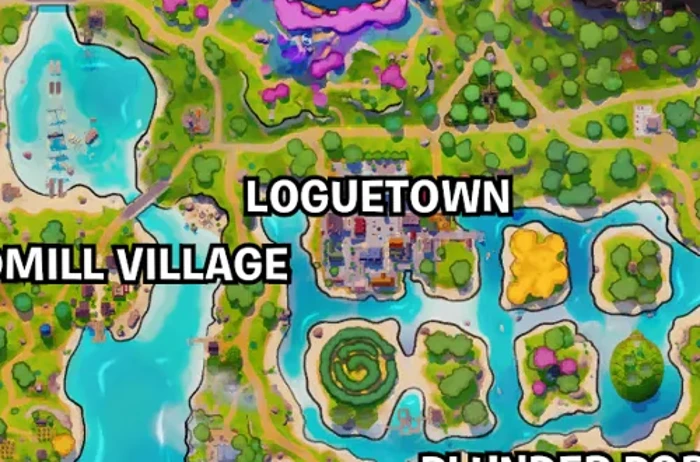
Map detail · South-central town
01 / South-central town
Loguetown
A town block is a useful starting point if you prefer searching connected buildings before choosing your next move.
Pick one edge of the town instead of landing in the middle of an exposed street.
Search one building from top to bottom. Listen for a chest before moving between floors.
Cross to the nearest unsearched building only when the street is safe, then recheck the storm.
Before you rotate: Check the nearby roads and water crossings before leaving. Do not commit to a distant second area before seeing the safe zone.
Map detail · Western island
02 / Western island
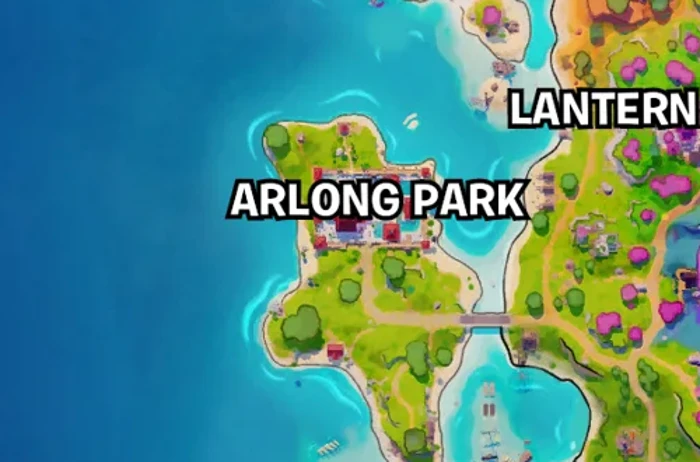
Arlong Park
The western island gives you a distinct area to search, with a visible road connection back toward the main island.
Choose a building you can reach directly from your landing.
Check upper and lower rooms where accessible, using chest audio to narrow the search.
Work through neighboring structures rather than crossing the island after a single empty room.
Before you rotate: Check the eastern road connection before rotating. If it is contested, look for another safe crossing available in your match.
Map detail · Northwestern island
03 / Northwestern island
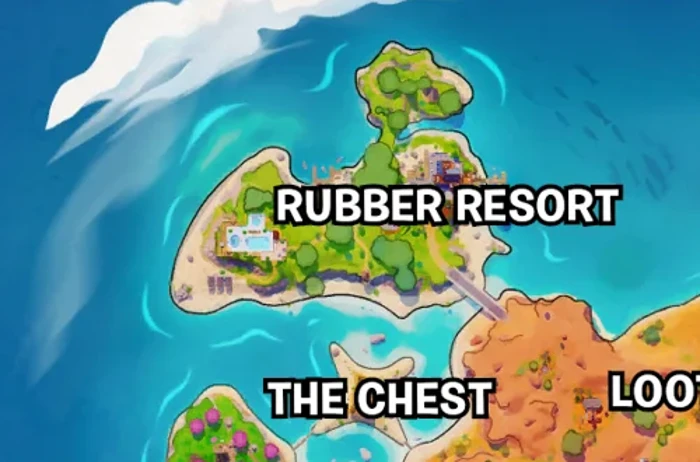
Rubber Resort
The northwestern island is easy to identify on the map. Its separated buildings make it useful for planning who searches each part of an area.
Pick a building or section before landing, especially when playing with friends.
Search the accessible floors and roof spaces of your first building before moving to the next.
Listen for unopened chests while moving between structures; leave any already searched building behind.
Before you rotate: Look toward the connection to the southeast and check the storm early. A long search on the edge of the map can leave little time to rotate.
Map detail · West-central mainland
04 / West-central mainland
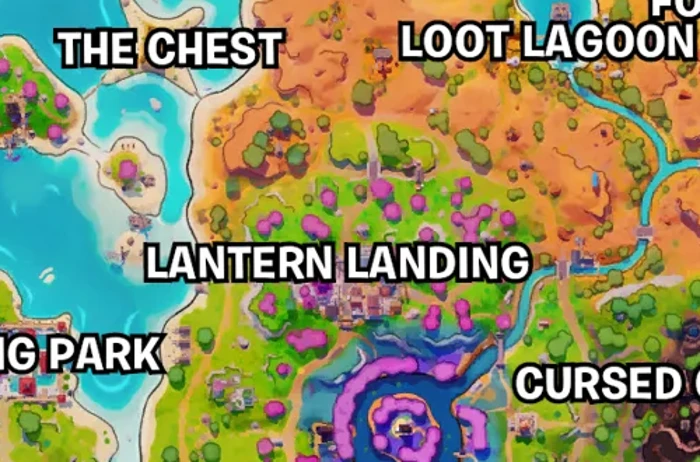
Lantern Landing
This west-central area can be a starting point for a mainland search when you want to avoid committing to an outer island.
Start with a visible building near your landing rather than running across open ground.
Search one compact cluster, checking inside and above accessible rooms when you hear a chest.
Mark buildings your squad has finished so the next player can move on.
Before you rotate: Choose the next nearby cluster after the safe zone appears. Avoid turning a chest search into a long exposed crossing.
Map detail · Southern waterfront
05 / Southern waterfront
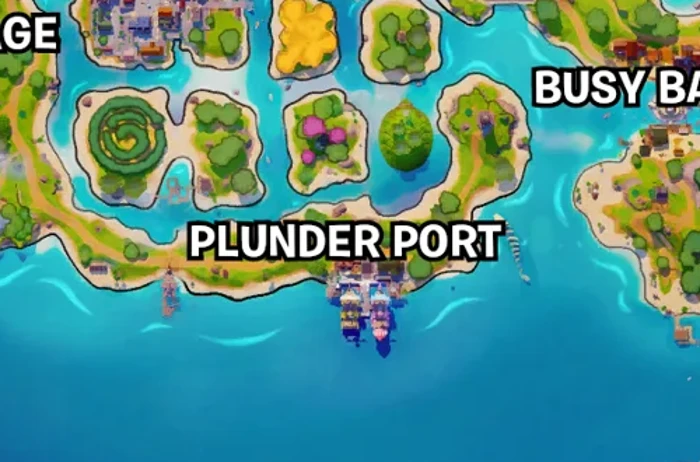
Plunder Port
The southern waterfront is a recognizable landing area for players who prefer to work through a coastal section.
Choose a land-side structure first so you can gear up before crossing open waterfront space.
Search accessible buildings and covered areas, following chest audio rather than assuming every structure has a spawn.
Move along one side of the area with your squad so you do not repeatedly search the same rooms.
Before you rotate: Plan your way inland before the storm closes. Water and open shoreline can make a late move harder to defend.
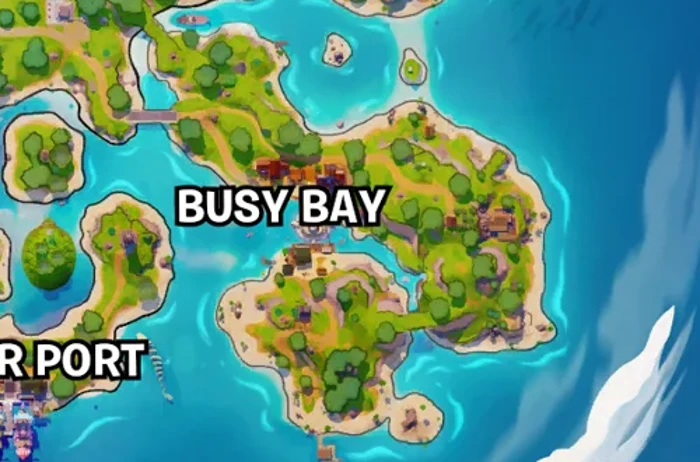
Map detail · Southeastern coast
06 / Southeastern coast
Busy Bay
Busy Bay is a southeast search option. Pick it when its position fits the bus route and you have a clear plan for leaving the coast.
Choose a compact section on the map before dropping.
Search nearby structures in a short loop, pausing to listen when you enter a building.
Keep the route flexible: if opponents control a building, move to the next safe search instead of forcing a fight over it.
Before you rotate: Check the northwest side for a route back toward the mainland, then adjust to the actual terrain and safe zone in your match.
What to check when you land
Listen before switching buildings
Use chest audio to decide whether to check above, below, or in a neighboring room. Visual sound effects can help you follow nearby chest cues when enabled in your game settings.
Search vertically
When a chest sounds close but is not in sight, check accessible upper floors, roof spaces, and lower rooms. Follow the sound rather than assuming a marker means a ground-floor chest.
Leave with time to spare
Check the storm after the first few buildings. A short search you can leave safely is more useful than a long loop that traps you outside the safe zone.
This is a November 3 map snapshot. Compare the named areas with the island shown in your match before using a route. The place called “The Chest” is a map location name, not a guaranteed token chest.